How to Use a Hydrometer in Winemaking [Simple Guide]

If you're about to embark on your first winemaking adventure you may have some questions about hydrometers.
A hydrometer takes the guess work out of winemaking and it's one of the most important pieces of equipment you'll need.
It's a fairly basic device but in order to use it correctly it's critical that you understand what it does and how to use it properly.
In this guide, I'll explain what a hydrometer is used for and how you can use it to produce wonderful wine!
What's a Hydrometer?
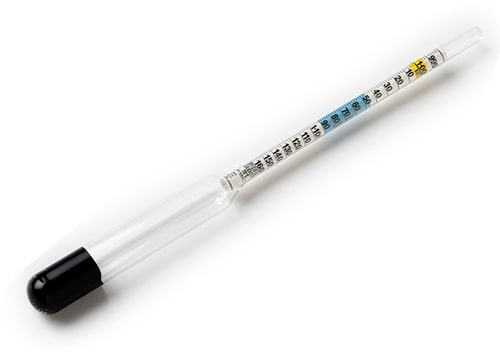
A hydrometer is a device that measures the density of a liquid.
It does so using the concept of buoyancy.
Basically, the more dense that a liquid becomes, the more buoyant that it is.
Measuring the density of wine throughout the stages of production is particularly useful as we'll explain next.

A hydrometer in action
Making alcohol relies on the principle of fermentation.
Our wine yeast devours sugars and produces alcohol (well, ethanol) and carbon dioxide.
As sugars are converted during fermentation, the density of our liquid decreases.
Using a hydrometer we can monitor the change.
What Does a Hydrometer Measure?
Before I explain exactly how to use a hydrometer when making wine, it's best to first explain the scales that a hydrometer uses.
There are usually three scales to be found on a hydrometer but some instruments may not use them all.
They are:
Specific Gravity (SG)
This is most commonly used when brewing beer but winemakers sometimes use this scale too.
It is based on the principle that distilled water equals 1.000.
A liquid with SG > 1.000 is more dense than distilled water and vice versa.
Specific gravity measurements usually range from 0.990–1.120.
Brix (B°)
Brix is the calibration most commonly used in winemaking.
Brix (or Balling) is a measure of pure sugar (sucrose) by weight.
For example, 1 °Brix is 1 gram of sucrose in 100 grams of liquid (or 1% sugar).
When fermentation is allowed to run its course and consume all sugars, a dry wine is produced. A completely dry wine measures 0 °Brix.
Potential Alcohol
This scale is used to give an estimate of the final ABV% of a finished wine.
By subtracting the pre-fermentation Potential Alcohol reading by the post-fermentation reading we get the ABV% of our wine.
We can also calculate ABV% with Brix and Specific Gravity.
How to Use a Hydrometer for Wine
It's a pretty straightforward process but there are a couple of really important things to consider. Here's how to take an accurate hydrometer reading.
1. Take a Sample
To take a hydrometer reading of your wine must you need first need to take a sample. Remember to take the sample using sanitized equipment.
Hydrometers are usually supplied with a testing jar with which to hold the sample, if not, you should buy one.
The testing jar is simply a cylindrical container that allows you to hold a sample of wine with which you can get a clear visual of the hydrometer reading.
We need a sample that's free of large solids. You can filter through something like a coffee filter if you're having trouble.
The testing jar should be placed on a completely flat and steady surface.

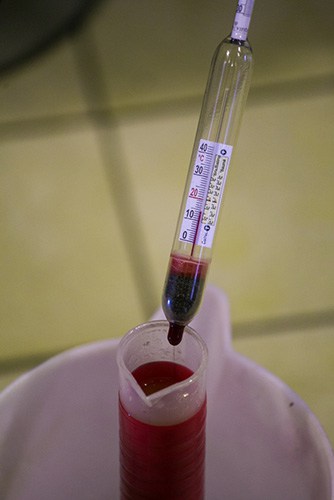
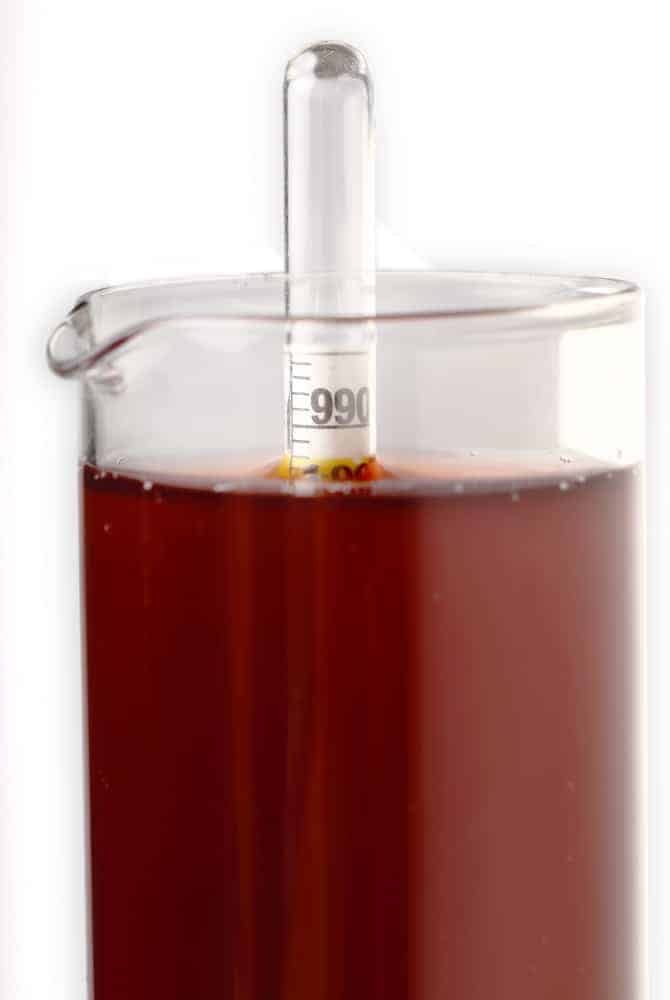
A hydrometer measuring the Specific Gravity of wine in a testing cylinder.
2. Test the Temperature
This is an important and often overlooked stage when using a hydrometer.
These devices are calibrated at specific temperatures. This means to get accurate readings you need your wine must to be at the same temperature.
If not, you can adjust for temperature using a chart (supplied with a hydrometer) or use an online tool.
The most common calibration temperature is 60°F (15.5°C) but make sure to consult your specific instructions before use.
3. Place the Hydrometer in the Jar
Once your sample is ready, the next step is to carefully place the hydrometer into the liquid.
If the hydrometer sinks to the bottom there is not enough liquid.
Try to eliminate any bubbles with a very gentle shake or spin. The bubbles will dissipate over time.
Once the hydrometer has stopped moving (and doesn't touch the sides) you can take a reading.
4. Take a Reading
Get your eye level with the surface of the liquid to take a hydrometer reading.
There's something really important to take into consideration before you write down the result.
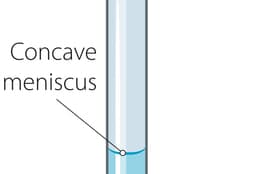
When a liquid is held in a container, surface tension causes some curvature on the surface.
This unavoidable phenomenon is called the meniscus and we need to account for this when taking our reading.

Your hydrometer measurement should be taken from the bottom of the meniscus.
It's advisable not to return your wine sample back to the fermenter afterwards as you risk contamination.
When to Use Your Hydrometer
A hydrometer should be used at 3 key stages when making wine at home.
Each stage gives you vital information about the state of your wine and the potential it has.
1. Before Fermentation
The first key measurement is to be taken before the yeast is added and fermentation begins.
This first hydrometer reading tells us how much sugar we have in our fruit must.
This allows us to estimate how much alcohol we will have in our final product.
For example, if we plan on fermenting our wine to dryness (converting all sugar to alcohol) then to calculate the alcohol potential we just multiply by 0.55 for our Brix reading.
22° Brix * 0.55 = 12.1 %ABV
We can also use a conversion table like this one:
Specific Gravity | Brix | Sugar Content (grams/liter) | Sugar Content (Oz/gallon) | Potential ABV % |
|---|---|---|---|---|
1 | 0 | 0 | 0 | 0 |
1.005 | 1.3 | 13 | 2 | 0.6 |
1.01 | 2.6 | 26 | 4 | 1.3 |
1.015 | 3.8 | 39 | 6 | 1.9 |
1.02 | 5.1 | 52 | 8 | 2.5 |
1.025 | 6.3 | 64 | 10 | 3.2 |
1.030 | 7.6 | 78 | 12 | 3.9 |
1.035 | 8.8 | 91 | 15 | 4.5 |
1.04 | 10 | 104 | 17 | 5.2 |
1.045 | 11.2 | 117 | 19 | 5.9 |
1.05 | 12.4 | 130 | 21 | 6.6 |
1.055 | 13.6 | 143 | 23 | 7.3 |
1.06 | 14.7 | 157 | 25 | 8 |
1.065 | 15.9 | 169 | 27 | 8.8 |
1.07 | 17.1 | 183 | 29 | 9.5 |
1.075 | 18.2 | 209 | 31 | 10.3 |
1.08 | 19.3 | 222 | 34 | 10.8 |
1.085 | 20.5 | 235 | 36 | 11.5 |
1.09 | 21.6 | 235 | 38 | 12.1 |
1.095 | 22.7 | 248 | 40 | 12.9 |
1.1 | 23.8 | 261 | 42 | 13.7 |
1.105 | 24.9 | 275 | 44 | 14.4 |
1.11 | 25.9 | 288 | 46 | 15.4 |
2. During Fermentation
A hydrometer allows you to track fermentation. The more sugar that has been consumed, the more progress has been made by the yeast.
You may wish to ferment your wine to completion and achieve a dry wine (all sugar consumed) or you may wish to retain some sugar for a sweeter wine.
Halting the fermentation is one such way to retain some sweetness in a wine. You must monitor the progress of the fermentation using a hydrometer so that you can stop fermentation at exactly the right time.
3. When Fermentation Stops
Eventually, your wine must will stop producing CO2 through the airlock. This is the first sign that fermentation has finished but it may also just have stalled.
The only way to know for sure is to use your hydrometer.
Take readings 48 hours apart. If they are the same then your fermentation is over. If it drops then fermentation is still active!
A wine fermented to dryness has readings as follows:
Brix = 0°
Specific Gravity = 1 SG
This final hydrometer reading allows you to calculate exactly how much alcohol is in your wine too.
How to Calculate Alcohol Content Using a Hydrometer
Once you have your initial reading (taken pre-fermentation) and your final reading (taken post-fermentation), a simple bit of math allows us to calculate the ABV of our wine.
Here's how:
For Specific Gravity (SG)
(Original SG - Initial SG)* 131 = Alcohol by Volume (%)
For Potential Alcohol
Initial Reading + Final Reading = Alcohol by Volume (%)
*Alcohol is less dense than water so sometimes we get a negative final reading. When this happens we just make it positive for the sake of our calculation.
For Brix (°Bx)
(Initial Reading - Final reading)* 0.55 = Alcohol by Volume (%)
Conclusion
A hydrometer is such a crucial piece of wine making equipment. Without one you are simply guessing and that's not something that works very well when making wine!
These days you're talking less than $20 and sometimes even less than $15 for a hydrometer and jar so you really have no excuse.
Just make sure to consult the instructions for the calibration temperature before use, as newer instruments tend to have warmer temperatures.
