A Must-Try Muscadine Wine Recipe [Full Instructions]
Muscadine wine is one of the few wines available made with 100% American grapes. We show how to make this patriotic tipple with our homemade muscadine wine recipe.

Imagine a wine that’s full bodied, fragrant and good for your health…. No, we’re not talking about spinach sauvignon or chia seed chardonnay, but the very real and easy-to-make muscadine wine!
You can make it at home by following this step-by-step recipe (if you enjoy making wine, don't forget to check out step-by-step recipes we have for our other homemade wines as well).
An Introduction to Muscadines

Recent research suggests that muscadines (a species of grapevine native to America) are something of a superfood.
They contain extremely high levels of polyphenols, powerful antioxidants which have shown to have huge potential health benefits, according to recent studies.
The skin of the muscadine grape also contains more fiber than oats or rice bran, and they are also rich in potassium, calcium and Vitamin C.
If you’ve never heard of muscadines, you’re not alone.
I had no idea what they were when I first started wine-making until I finally looked them up and had a moment of clarity: they’re grapes!
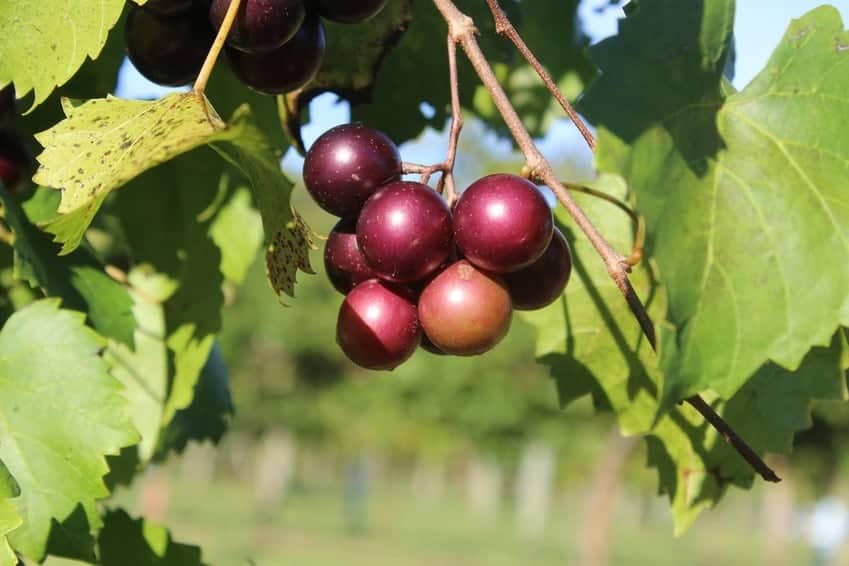
Big, fat, black-skinned, juicy grapes which grow in abundance all across the southern states of America, from Florida all the way to eastern Texas.

Despite their name, they are not to be confused with the ‘muscat’ varieties of grape which are found in Europe and South America.
It is thought that the muscadine got its name because of its physical similarities to muscat grapes, or perhaps due to the ‘musky’ scent of the skin when ripe.
Either way, don’t expect to end up with a dry and light muscat-like wine from these grapes – muscadine wine is rich and sweet, and best suited as a dessert wine or a substitute for port.
Since the 16th century, southerners have been cultivating huge crops of muscadine grapes and using them to make wines, jellies, jams and juices, sharing all their tips and wine-making hacks along the way.
Today, it has never been easier to make DIY muscadine wine in your own home, then legitimately tell everyone that it was produced by your private vineyard.
They don’t need to know that ‘private vineyard’ is shorthand for ‘those wild grapes growing at the bottom of my garden which basically look after themselves until September when I wander down with a bucket and pick them.’
For muscadine aficionados, this wine is not to be confused with the ever-popular ‘Scuppernong’.
They are both made from the same grapes, but that’s where the similarities end.
Scuppernong is a potent liquor made from young, bronze-colored muscadine grapes, which are boiled with sugar, then cooled, strained and added to vodka.
The result is a dangerously drinkable liquor which only gets more potent the longer you leave it!
This recipe will tell you how to find muscadine grapes, when to pick them, and how to turn them into a delicious and drinkable wine which may actually be good for your health.
As long as you don’t drink too much of it, of course…

Section 1: Equipment for Making Muscadine Wine
If you’ve made fruit wine before, you will probably already own most of this equipment.
But just in case you need a reminder, here are all the different pieces of kit you need before starting to make muscadine wine.
IMPORTANT NOTE: Every piece of equipment should be fully sterilized before and after use.
Even the tiniest speck of dirt or bacteria can wreak havoc with your fermentation process, ruining your wine before it’s even had a chance to ferment.
I use campden tablets to sterilize (which also double up as wine stabilizers) but boiling hot water will also do the trick.
Try to stay clear of bleach or other toxic products, as any unwashed residue can make you pretty sick. As far as I’m concerned, it’s just not worth taking that risk.
Here's a list of the basic equipment needed for homemade muscadine wine:
If you're just starting out on your wine making journey then it might be easier to get a complete wine making kit like this one (click on the image to read more on Amazon):

OPTIONAL EXTRAS:

Section 2: Ingredients for Muscadine Wine
You've got your equipment ready and you're raring to go! The next step is to gather those precious ingredients that'll soon be transformed into beautiful muscadine wine.
Here's what you need:
How to Find & Pick Muscadines
Wild muscadines are native to the southeastern states of America, where they can ripen slowly during the warm, humid summers.
They love deep, fertile soil, so if you’re setting out to find muscadines for the first time, start hunting around the riverbeds.
Louisiana’s wetlands are another sure-fire source of the fruit, and there have even been sightings along the Gulf Coast.
If you want to grow your own muscadines, it’s incredibly easy. Just plant the seeds in a sunny, well irrigated spot and let nature do its thing!
Muscadines are hardy grapes which are pretty resistant to most pests and diseases. They don’t even need fertilizer.
And while you’re very welcome to become a grape obsessive, and invest in a lot of fancy vine-trailing equipment, your grapes will grow just as well if you leave them to it.

Once your mini vineyard is complete, just watch out for any changes.
You should start to see a few blossoms appearing in early April, followed by small green/yellow grapes, growing in clusters of 4-10.
By the summer months, the grapes should have turned a dark purple, then black, and they should be so ripe that they are almost falling off the vines by themselves. That’s when you start to harvest them.
These grapes are so plentiful that during harvest season (late July-late September) the grapes can be found in supermarkets up and down the country, and many southern farmers offer ‘U-pick’ schemes, where members of the public are invited to pick as many grapes as they can in return for free produce.
This is a cheap (well, free!) and easy way to stock up on ripe muscadines, so keep an eye out for roadside signs and notices in your local town and get in fast before the best fruits are gone!
If possible, pick your muscadines on a warm, sunny day, either in the late morning or the late evening. And don’t be tempted to snack on them while you pick – muscadines have a very tough skin which you might struggle to bite through.
While the insides are pulpy and sweet, the skin is extremely bitter and the raw taste of the grapes might just put you off continuing with the wine.
But don’t worry – this is exactly what makes muscadine wine one of the nicest homemade wines on the planet.
The bitter skin is full of tannin, which helps give your wine body and color, and the natural acidity just means that you don’t need to add citric acid or lemon juice to your wine-making process.
Finally, remember that from the moment you pick the grapes from the vine, they will start to lose their flavor and rot away.
Plan enough time to start making your muscadine wine the same day that you pick the fruit – ideally you will be ready to start the first steps within an hour of picking the grapes.

Section 3: How to Make Muscadine Wine
You've assembled the equipment and ingredients. The first test is passed! Now, let's get started for real!
1. Prepare Your Muscadines
If you have sensitive skin, now is the time to don your rubber gloves.
Wash all your grapes and remove them from the vine, making sure that there are no tiny pieces of stalk left on the end of the fruit.
Now you have to break through the tough exterior of the fruit – and this is a lot harder than it sounds!
If you were simply enjoying your muscadines as a snack, you would probably just piece the skin with a needle or a knife and suck the pulp out from inside.
But for wine-making purposes, you want to cut through as much of the fruit as possible, so that are able to mash the mixture up.
There are lots of different techniques on how to do this, and you will probably discover your own favorite.
Here are a few of mine:
1. The ‘Freddy Kruger’ method
Put your muscadines in a large bowl, then take four sharp-ended knitting needles, and hold them between your fingers, then form a fist.
Use your ‘Freddy Kruger’ hands to punch into the bowl, piercing as many grapes as you can each time.
2. The ‘bread knife’ method
Trap a handful of muscadines between two Tupperware lids or chopping boards, and press down on the top so that the muscadines can’t escape.
Then use a bread knife (or any knife with a serrated edge) to cut horizontally through the middle, cutting all the muscadines in half.
3. The ‘tenderizing’ method
Put on a pair of work goggles, take a meat tenderizer (a clean mallet or hammer would also do), and just bash away at the grapes to your heart’s content!
4. Freeze them
This is probably the easiest way to get the skins off to be honest, but it’s not as much fun as options 1-3.
Put your grapes in a bag and pop them in the freezer. After a few hours, the skin should have cracked so you can just defrost them and move on to Step Three.
2. Start Cooking
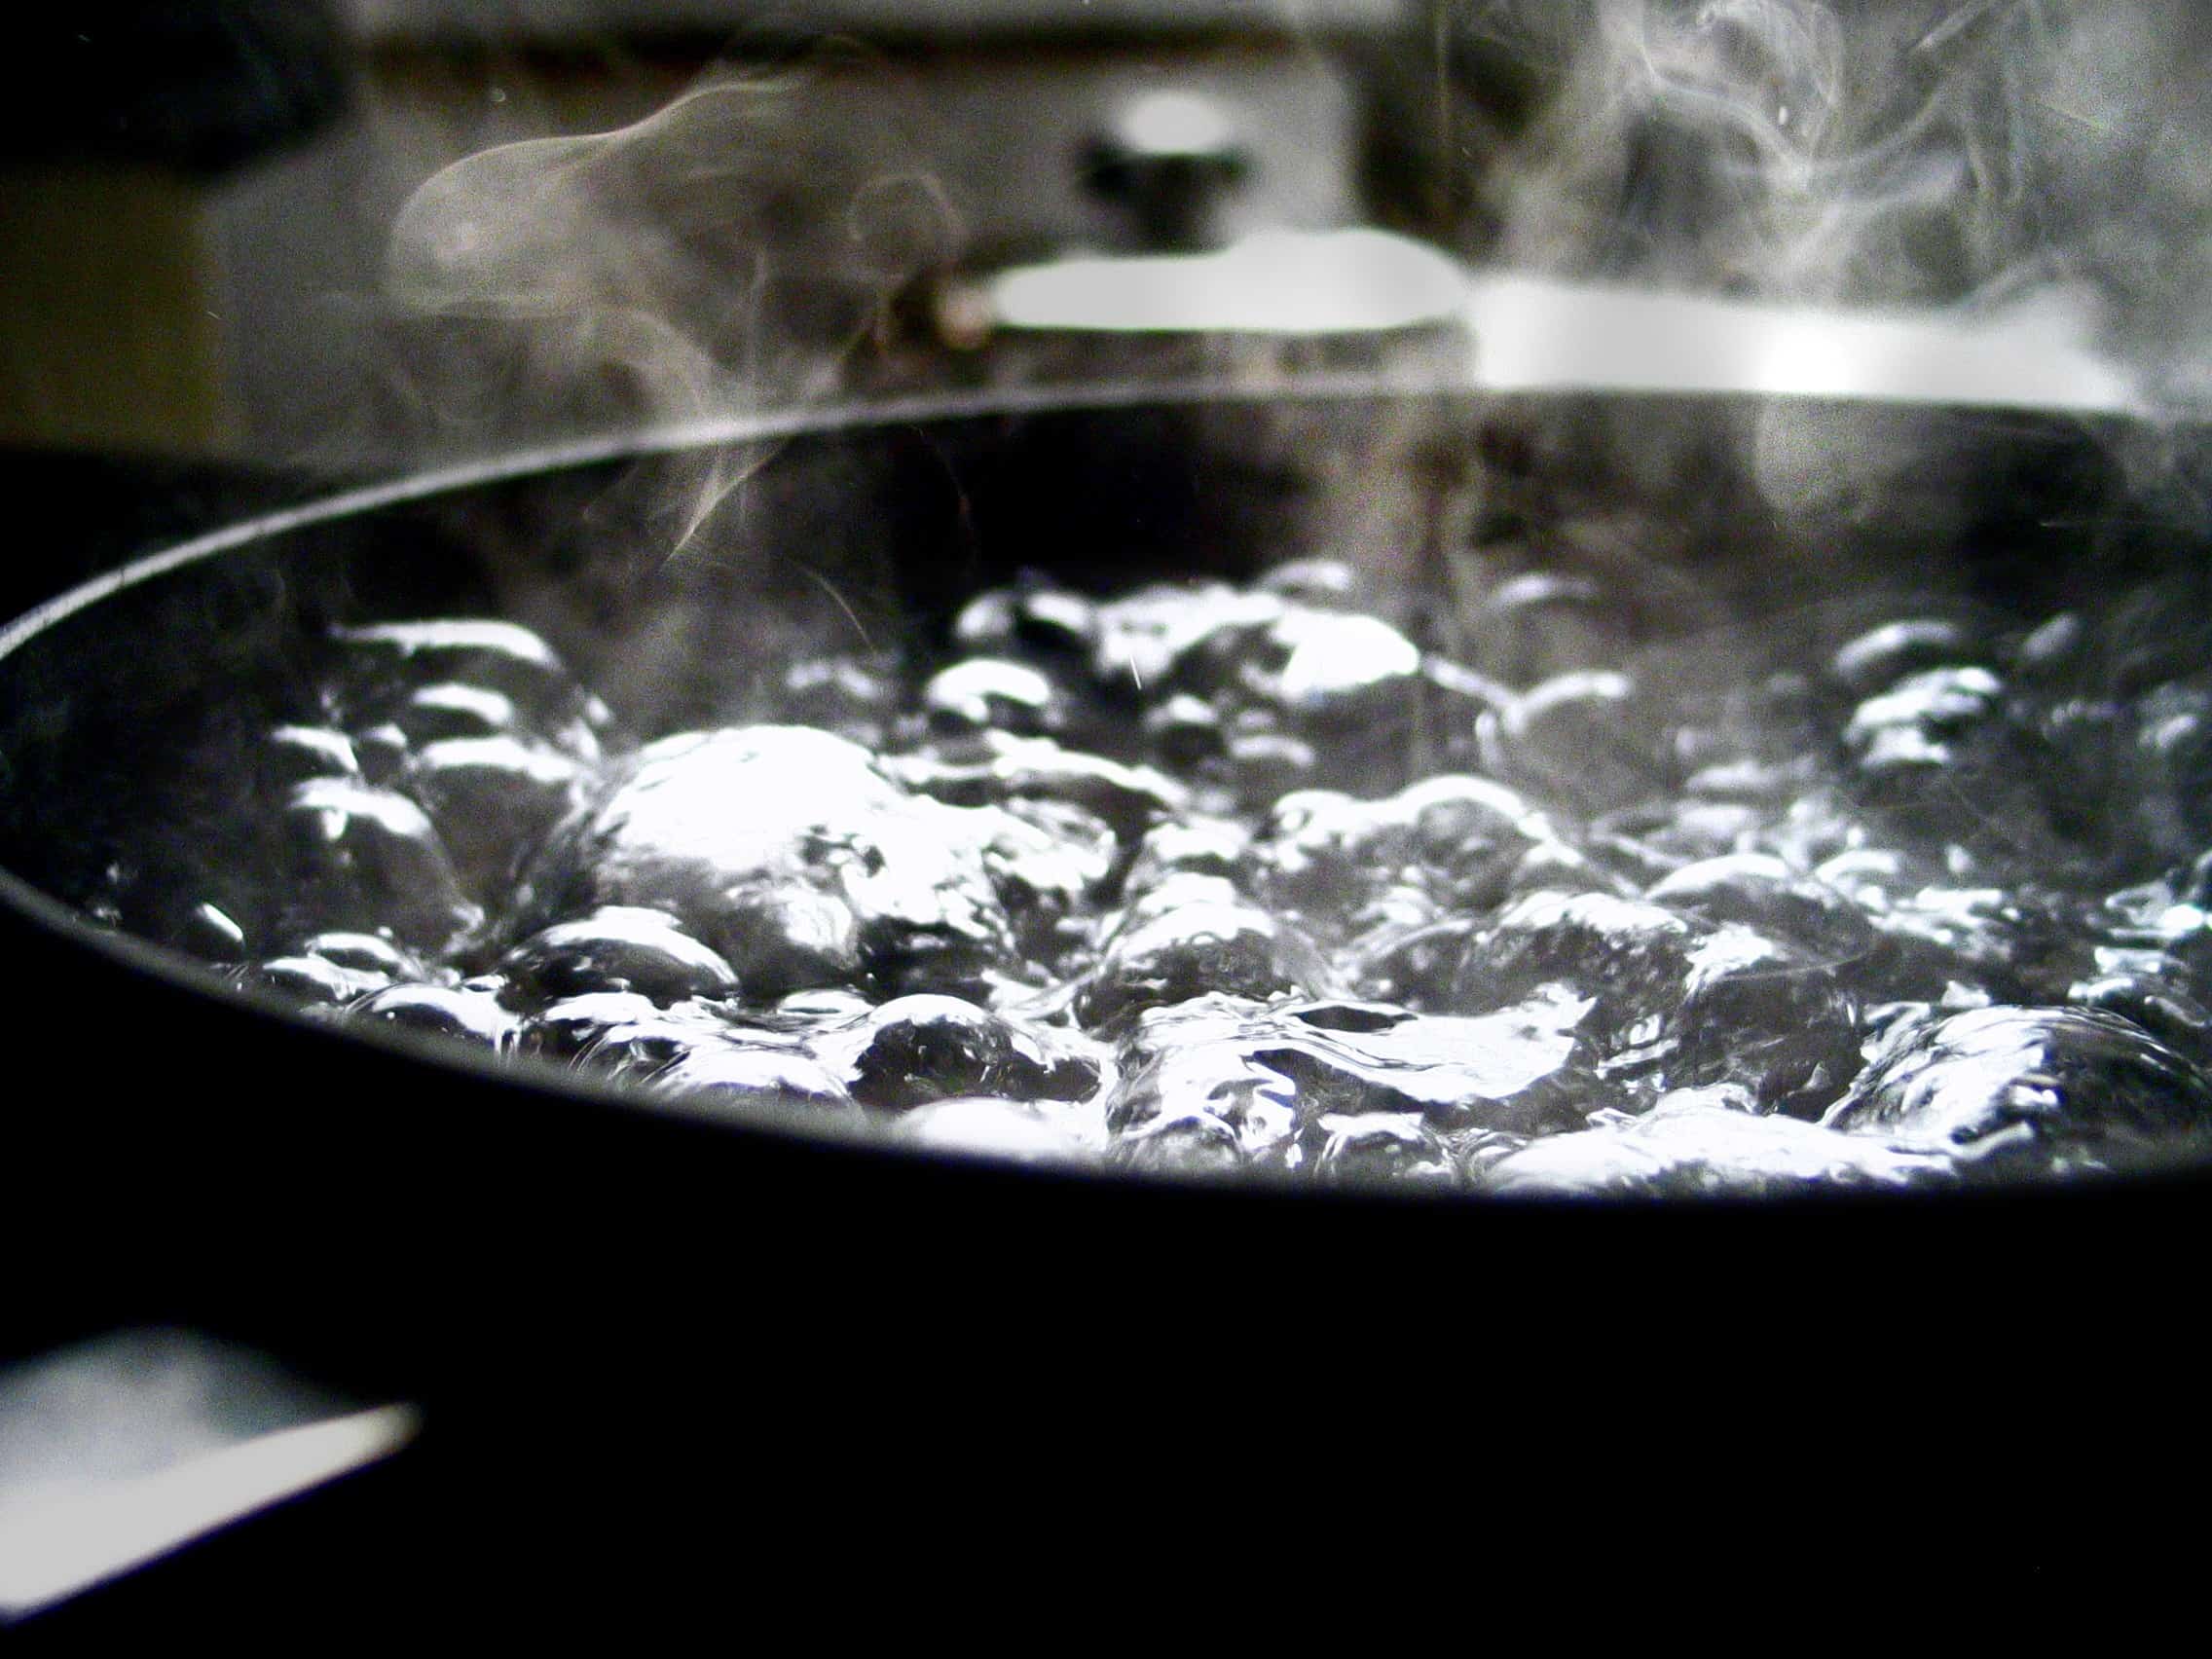
Bring three quarts of water to the boil, then allow it to cool. Then add the sugar to the water and stir until it has completely dissolved.
Meanwhile, make sure your muscadines are well and truly mashed – you want to release as much pulp as possible at this stage.
When you’re happy with the consistency, tightly fix your straining bag over the top of your brew bin, and pour the grape mix over the top. Squeeze the bag well so that you get every drop of grape juice out of it.
You should now have a slightly murky looking dark red liquid in your bin. Pour over the water and sugar, and add the yeast nutrient and the yeast.
Give it a gentle stir, then cover the brew bin and leave it to ferment for 7-10 days, stirring every day or so.
You will find that the mixture bubbles quite a lot for the first few days, before settling down a bit. When the bubbles stop, the fermentation process has ended.
Top Tip #1: If you have a hydrometer, this is your first opportunity to use it! After the first 24 hours, you should have a gravity reading of between 1.100 and 1.003. When the reading hits 1.030, the fermentation process is complete, and you can move on to the next step.
Top Tip #2: If you’re using an acid testing kit, you can start testing your wine after 24 hours. Follow the instructions on the pack in order to get your reading – you are looking for an acid level of no more than 7 p.p.t. tartaric.
3. After Fermentation
After a week or so, your muscadine mix should have completed this first part of the fermentation process, but you will probably find that there is a little bit of foam still sitting on the top of the liquid, and some sediment collecting at the bottom.
Strain the mixture once more to remove all these little ‘bits’.
Now it’s time to move the wine into one of your demijohns.
Put down a few towels and set up a work area where you can splash away to your heart’s content.
Then using your funnel, pour the wine mix straight into the demijohn.
If the liquid doesn’t quite reach the neck of the bottle, top it up with some filtered or bottled water, and a teaspoon or two of sugar (the rule is one part sugar for three parts water).
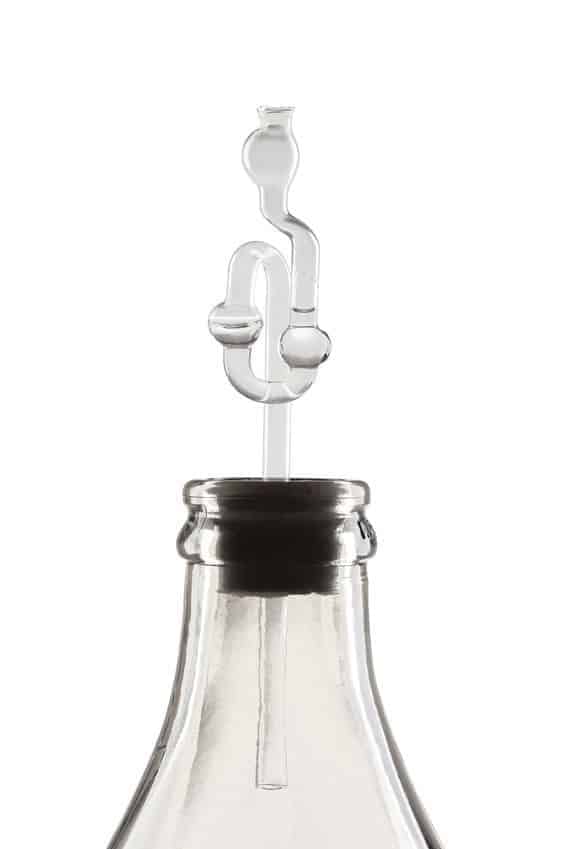
Then fit your bung and your airlock, and leave the demijohn to sit in a cool and dark place for at least three weeks.
4. Rack and Repeat
After three weeks or so, your wine should start looking like, well, wine!
Any bubbling should have slowed down or completely stopped, and other than a thin layer of yeast and fruit sediment at the bottom of the bottle, the liquid should be clean, clear and ruby red.
Now it’s time to start the racking process.
This will clarify your wine even further by moving all the wine into your second demijohn, leaving behind any tiny bits of residue in demijohn number one.
Because muscadines have such a deep color and a tough skin, you will need to repeat the racking process at least twice with this wine in order to get the best possible result.
Once you’ve racked your first gallon of wine, you’ll find it easy to do it again. Just follow the instructions below and get racking!
How to Rack Your Homemade Wine
- 1Very gently lift your wine-filled demijohn and place it on a table or flat chair. Make sure you don’t disturb any of the sediment at the bottom of the jar, but if you do, just leave the demijohn sitting there for a few hours until the sediment has settled again.
- 2Put the second demijohn on the ground below, making sure that it is completely flat.
- 3Remove the bung and airlock, then take your siphon tube and lower it into the wine until it is around half an inch from the bottom of the jar – you want to siphon off only the ‘good’ wine liquid, leaving the sediment behind.
- 4Get things started by sucking on the other end of the tube until you taste wine, then quickly stick this end of the tube into the second demijohn and watch it fill up!
- 5Top up your racked/siphoned wine with a little filtered water and a teaspoon of sugar, then put the airlock back on and leave it in a dark, cool place for another three weeks.
- 6After three weeks, repeat the racking process again.
5. Bottling it up!
You can rack your wine as many times as you need to before you start thinking about bottling, but two or three times should be enough.
After each racking, make sure you wait at least three weeks before siphoning off the wine again.
When you’re happy with the color and clarity of the wine, you can start bottling!
Just like the racking process, the botting process involves one wine-filled demijohn sitting on a table, and your six glass bottles lined up on the ground below.
Again, you simply dip the siphon tube towards the bottom of the demijohn, suck on the other end until the liquid starts to flow, then pour the wine directly from the tube into the bottles until it’s finished.
Using your corker, cork and seal the bottles and construct a few labels with the date of bottling and the ingredients – on the off chance that you forget!
Now comes the really hard part…waiting.
Muscadine wine tastes best after it has been left to mature for two or three years. This is a LONG time to wait before sampling your wares, so I suggest you open one bottle after 6 months, another 6 months later, and so on, so that you can experience the changes in the wine’s flavor over time.
Even after a year’s maturation, you should be so pleasantly surprised by the wine’s depth of flavor that you will go out and start collecting muscadines for your next batch before the season is done.
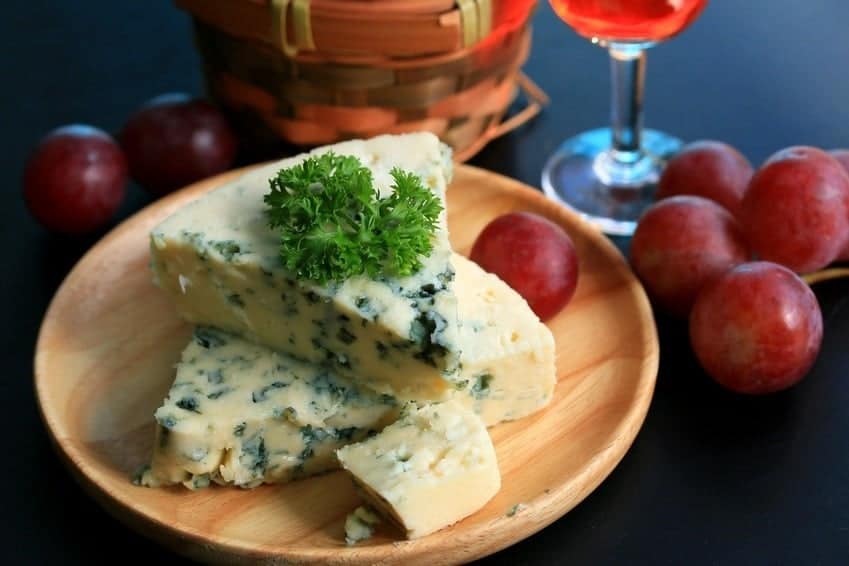
However, after two years, the wine will take on an incredible richness that’s really worth the wait – it has been described as port-like in its taste and color, and you could happily serve it alone with a plate of good cheese and biscuits at the end of a meal.
Tell us how you drink your muscadine wine, and how long you managed to wait before raiding your wine cellar!
I have never quite managed to make it past two years, so I wonder whether the flavor intensifies even further after four years, or five.
If you have any variations on this recipe, or innovative serving suggestions, get in touch and share them with the Wine Turtle community!
Recommended Article: Check out our guide on how to make banana wine next!
Conclusion
It may not have the cache of the Napa Valley vineyards, but muscadine wine is arguably the most popular home-grown wine in America.
Not only that, but when you know where to look, you will find these wild grapes growing absolutely everywhere!
The recent reports on the health benefits of muscadine grapes mean that more and more people are cultivating the fruit than ever before, although there is more money to be made by selling the seeds, than by producing and selling commercial quantities of wine.
That means that homemade muscadine wine may soon be the only muscadine wine you can get your hands on – so it’s a good job it’s so easy to make!
Let us know how you get on with your wine-making projects, and feel free to share this article with your friends and family so that you can spread the muscadine message!
Being new to win making I am lost as to some things such how much ju i.e. Should you have from like 10 lbs of muscidians ? How come sugar amounts vary so much from rescipe to recipe.
Enjoyed your website.
Contrary to this article, scuppernongs are not immature muscadines. A scuppernong is a variety (or subspecies) of muscadine. They are gold when fully mature. All scuppernongs are muscadines but all muscadines are not scuppernongs. I have both in my vineyard, as do most southerners. Scuppernongs make great wine, without vodka.
Just so you know the Muscadine and Scupadine , that’s right Scupadine not Scupernong their a southern grape and should be called by their southern names to start with, second they are not the same or even remote the same, they have there on habitats they grow in in they have totally different flavors when ripe. One is deep purple to near black and tends to grow in small clusters of four to ten medium size fruit. The Scupadine however grows in singles to small groups or two or three at most and are golden brown in color once fully ripe. Muscadines wll ripen with out cold weather, Scupadines require very cool nights to fully ripen and develop their best flavor.
I believe that Scupadine and Scuppernong are one and the same just called different things in different parts of south.
I used a lemon squeezer to mash my grapes. It seems to do a good job. Be ready to have cramps in your hands if you are making 5 gallon batches.